Reinforcement learning is the often forgotten sibling of supervised and unsupervised machine learning. But now, with its important role in generative AI learning, I wanted to touch on the subject with a fun introductory example. Fun projects like these can always teach you a lot.
I was inspired by YouTuber Nick Renotte (video: https://www.youtube.com/watch?v=Mut_u40Sqz4) and retried his Project 2 from the two-year-old tutorial. In this tutorial, we teach a model to race a car.
F1 drivers learn from experience, and so does a reinforcement learning agent. Let’s look at teaching such an agent to race through training and making it learn from repeated experience.
A quick recap of Reinforcement Learning (RL)
The docs of RL library, called “Stable Baselines3”, states the following,
“Reinforcement Learning differs from other machine learning methods in several ways. The data used to train the agent is collected through interactions with the environment by the agent itself (compared to supervised learning where you have a fixed dataset for instance).”
https://stable-baselines3.readthedocs.io/en/master/guide/rl_tips.html
So in RL, there is the concept of an agent/model interacting with its surroundings and learning through rewards. Actions that lead to achieving the goal are rewarded and so are reinforced as being “good” actions.
For the environment, i.e. our race track, we can use the already created, “CarRacing” environment from the “Gymnasium” project – the actively developed fork of OpenAI’s project called “Gym”. Gymnasium helps to get started quickly with reinforcement learning with many pre-made environments.

In CarRacing, the reward is negative (-0.1) for every frame and positive (+1000/N) for every track tile visited, where N is the total number of tiles visited in the track. Hence, the car is encouraged to move as quickly as possible and visit new parts of the track. The negative reward penalises staying still as the agent is encouraged to get to the finish asap. The positive reward encourages the car to visit new parts of the track as quickly as possible.
For our agent, I will use the PPO algorithm from the Stable Baselines3 library which comes with a general but good choice of hyperparameters for its models.
PPO: Proximal Policy Optimization
PPO is an algorithm for training RL agents. It has been used before in the fine-tuning of large language models via Reinforcement learning from human feedback (RLHF: https://en.wikipedia.org/wiki/Reinforcement_learning_from_human_feedback).
In PPO, the agent selects random actions which get less random over time as it learns. PPO is conservative in its learning process and makes sure not to change its policy (essentially its brain) by changing too much in each update. Constraining updates in this way leads to consistent performance, stability and speedy learning. However, this may also cause the policy to get stuck in a sub-optimal method for success. PPO seems to work well for this task in a short amount of time without requiring huge memory resources. It’s great to get started.
Read more about it: https://spinningup.openai.com/en/latest/algorithms/ppo.html
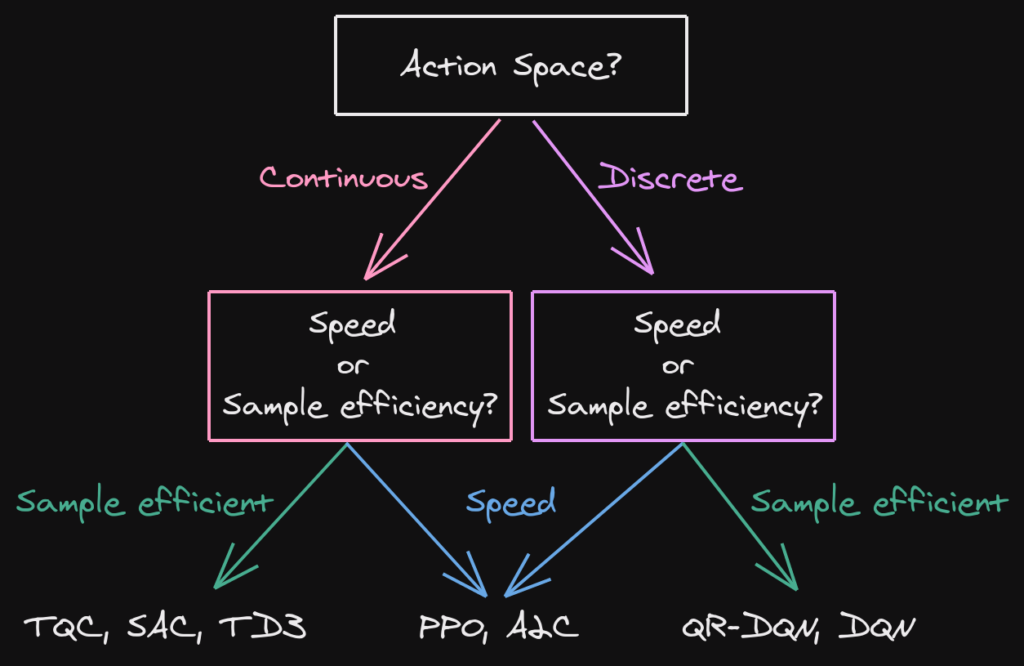
Whereas Nick used the stable baslines3 library directly, I will use Stable Baseline’s “RL zoo” – a framework for using Stable Baselines3 in an arguably quicker and more efficient way – all on the command line. RL Zoo docs: https://stable-baselines3.readthedocs.io/en/master/guide/rl_zoo.html
Training with RL Zoo – Reinforcement boogaloo
I found an easy way to get training our PPO agent (see: https://github.com/DLR-RM/rl-baselines3-zoo). I followed the installation from source (this requires git). I also recommend you create a virtual environment for all the dependencies.
git clone https://github.com/DLR-RM/rl-baselines3-zooYour system is probably different from mine and my commands for the command line are aimed at Linux/MacOS so you may need to translate some commands for your system.
Really make sure to have all the dependencies!
pip install -r requirements.txt
pip install -e .
Now let’s start training. Specify the algorithm (PPO), the environment (CarRacing-v2) and the number of time-steps (try different numbers!). For example you can try 500000 time steps.
python -m rl_zoo3.train --algo ppo --env CarRacing-v2 --n-timesteps 500000
This may take a few minutes. If you’re on Linux and get error: legacy-install-failure you may also need to install a few more packages.
sudo dnf install python3-devel<br>sudo dnf install swig<br>sudo dnf groupinstall "Development Tools"Once training is complete, you can visualise the learning process by plotting the reward over time/training episodes.
python scripts/plot_train.py -a ppo -e CarRacing-v2 -y reward -f logs/ -x steps
Increasing rewards with episodes indicates that the agent is learning.
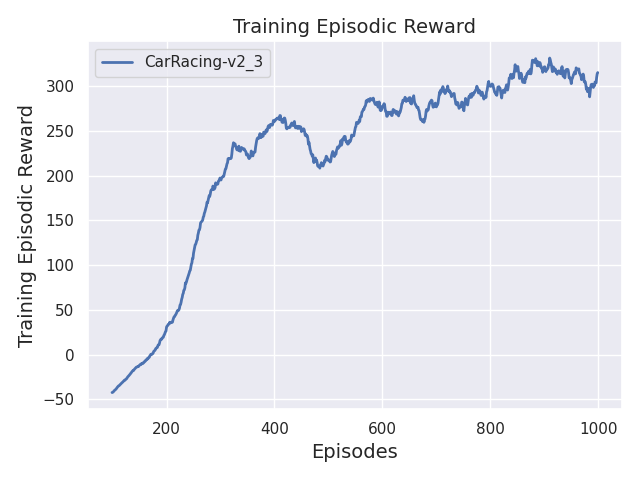
Record a video of your latest agent with
python -m rl_zoo3.record_video --algo ppo --env CarRacing-v2 -n 1000 --folder logs/I tested the agent after 4,000,000 time steps of training (~2hr for me) and got this episode below – what a good run!
RL zoo allows you to continue training if you want to improve it.
python train.py --algo ppo --env CarRacing-v2 -i logs/ppo/CarRacing-v2_1/CarRacing-v2.zip -n 50000Thanks for reading!

